
If you're ready to fire up that Big Green Egg, you've got to check out these five fantastic recipes! From juicy Grilled Chicken Thighs that'll make your taste buds dance to the smoky goodness of Smoked Brisket, there's something here for everyone. And don't forget about the perfectly roasted veggies and that drool-worthy Cedar Plank Salmon. Plus, who could resist a slice of Classic Neapolitan Pizza? Trust me, you won't want to miss what comes next!
Grilled Chicken Thighs With Herb Marinade
Grilled chicken thighs with herb marinade are a delicious and easy way to enhance your grilling game. The juicy, tender meat pairs perfectly with a blend of fresh herbs, garlic, and a squeeze of lemon, creating a dish that's bursting with flavor. Ideal for summer barbecues or a cozy family dinner, this recipe will surely impress your guests and become a staple in your cooking repertoire.
Ingredients:
- 6 bone-in, skin-on chicken thighs
- 1/4 cup olive oil
- 2 tablespoons fresh rosemary, chopped
- 2 tablespoons fresh thyme, chopped
- 4 cloves garlic, minced
- Juice of 1 lemon
- Zest of 1 lemon
- Salt and pepper to taste
Instructions:
In a large bowl, combine the olive oil, chopped rosemary, thyme, minced garlic, lemon juice, lemon zest, salt, and pepper to create the herb marinade.
Add the chicken thighs to the bowl, ensuring they're well coated in the marinade. Cover the bowl and let the chicken marinate in the refrigerator for at least 1 hour, or ideally overnight for maximum flavor.
Preheat your grill to medium-high heat, then remove the chicken from the marinade, shaking off any excess.
Place the chicken thighs skin-side down on the grill and cook for about 6-7 minutes. Flip the thighs and grill for an additional 6-7 minutes, or until the internal temperature reaches 165°F and the skin is crispy and golden.
Extra Tips:
For an even more flavorful dish, consider adding a touch of honey or Dijon mustard to the marinade for a hint of sweetness and tang.
If you don't have fresh herbs on hand, dried herbs can be used as a substitute, but remember to use them sparingly, as dried herbs are more concentrated in flavor.
Always let the grilled chicken rest for a few minutes before serving to allow the juices to redistribute, ensuring each bite is moist and flavorful.
Enjoy your grilled chicken thighs with a side of grilled vegetables or a fresh salad for a complete meal!
Smoked Brisket With BBQ Rub
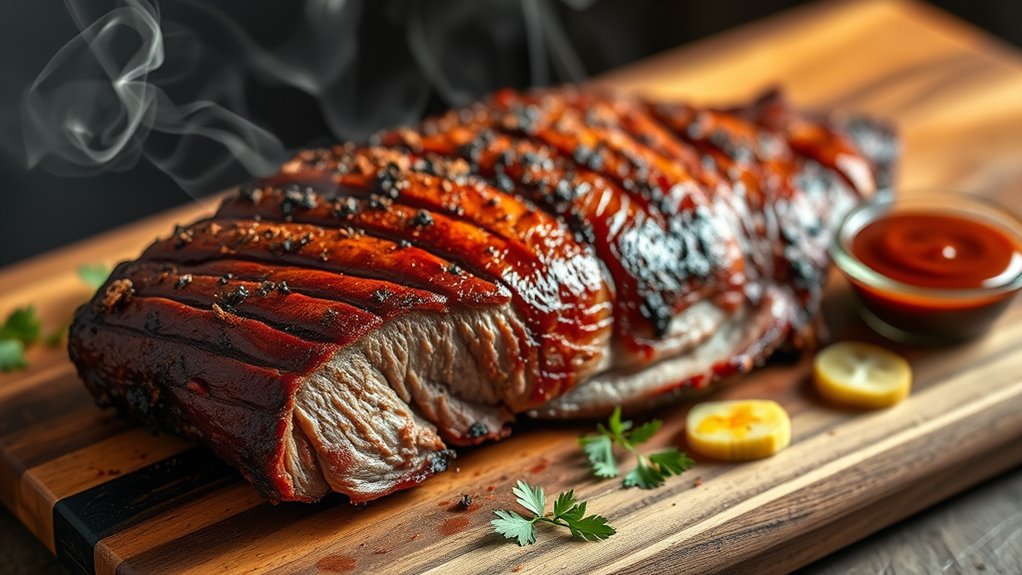
Smoked brisket with BBQ rub is a quintessential dish that brings together the rich flavors of slow-cooked meat and a smoky essence that will tantalize your taste buds. The combination of spices in the BBQ rub improves the natural flavor of the brisket, making it a favorite among barbecue enthusiasts.
With a little patience and the right technique, you can create a mouthwatering smoked brisket that's perfect for gatherings, celebrations, or a cozy family dinner.
Ingredients:
- 5-7 pounds of brisket
- 2 tablespoons kosher salt
- 2 tablespoons black pepper
- 2 tablespoons smoked paprika
- 1 tablespoon garlic powder
- 1 tablespoon onion powder
- 1 tablespoon brown sugar
- 1 teaspoon cayenne pepper (optional for heat)
- 1 tablespoon mustard (for slathering)
- Wood chips (hickory or mesquite for smoking)
Instructions:
Begin by preparing the brisket; trim excess fat, leaving about a quarter inch for moisture during cooking.
In a bowl, combine the kosher salt, black pepper, smoked paprika, garlic powder, onion powder, brown sugar, and cayenne pepper to create your BBQ rub.
Rub a thin layer of mustard over the brisket to help the spices stick, and then generously apply the BBQ rub all over the meat.
Preheat your smoker to 225°F (107°C) and soak your wood chips in water for at least 30 minutes.
Place the brisket in the smoker, fat side up, and add the wood chips to produce smoke.
Smoke the brisket for about 1 to 1.5 hours per pound, or until it reaches an internal temperature of 195-205°F (90-96°C).
Once done, wrap the brisket in foil and let it rest for at least 30 minutes before slicing.
Extra Tips:
For the best flavor and tenderness, consider brining the brisket the night before cooking.
Additionally, using a meat thermometer can help you monitor the internal temperature accurately, ensuring perfect doneness.
Remember to let the brisket rest after cooking; this allows the juices to redistribute throughout the meat, making each slice moist and flavorful.
Finally, feel free to experiment with different wood types for smoking to find your preferred flavor profile!
Perfectly Roasted Vegetables
Roasting vegetables is a simple yet effective way to bring out their natural sweetness and improve their flavors. This method not only caramelizes the edges, giving them a delightful crunch, but also makes them irresistibly delicious.
Perfectly roasted vegetables can be a side dish, a main course, or even a topping for salads or grain bowls. With just a few ingredients and the right technique, you can create a colorful and nutritious dish that pleases any palate.
Ingredients:
- 2 cups of broccoli florets
- 2 cups of cauliflower florets
- 2 cups of carrots, sliced
- 2 cups of bell peppers, chopped
- 3 tablespoons of olive oil
- 1 teaspoon of garlic powder
- 1 teaspoon of onion powder
- 1 teaspoon of dried thyme
- Salt and pepper to taste
- Fresh parsley, chopped (for garnish)
Instructions:
Preheat your oven to 425°F (220°C). In a large bowl, combine the broccoli, cauliflower, carrots, and bell peppers. Drizzle the olive oil over the vegetables and sprinkle with garlic powder, onion powder, dried thyme, salt, and pepper.
Toss everything together until the vegetables are evenly coated. Spread the vegetables in a single layer on a baking sheet lined with parchment paper. Roast in the preheated oven for 25-30 minutes, stirring halfway through, until the vegetables are tender and golden brown.
Extra Tips:
For the best results, make sure the vegetables are cut into uniform sizes to guarantee even cooking. You can also experiment with different vegetables based on what you have on hand or what's in season, such as zucchini, asparagus, or Brussels sprouts.
If you like a bit of heat, consider adding a pinch of red pepper flakes. Finally, don't hesitate to drizzle a little balsamic vinegar or lemon juice over the roasted vegetables just before serving to uplift the flavors even further!
Cedar Plank Salmon With Lemon and Dill

Cedar plank salmon with lemon and dill is a delightful dish that combines the rich, smoky flavor of cedar wood with the fresh, zesty notes of lemon and the aromatic touch of dill.
This method of cooking salmon not only improves its natural flavors but also keeps the fish moist and tender. Perfect for a summer barbecue or a cozy dinner, this recipe is sure to impress your guests and leave them craving more.
Ingredients:
- 1 cedar plank (soaked in water for at least 1 hour)
- 4 salmon fillets (about 6 ounces each)
- 1 lemon (sliced into rounds)
- 2 tablespoons fresh dill (chopped)
- 2 tablespoons olive oil
- Salt and pepper to taste
Cooking Instructions:
Preheat your grill to medium heat.
While the grill is heating, pat the salmon fillets dry with a paper towel and season both sides with salt and pepper. Drizzle olive oil over the fillets and sprinkle the chopped dill on top.
Once the grill is ready, place the soaked cedar plank on the grill grates and close the lid for about 5 minutes to heat the plank.
Carefully place the seasoned salmon fillets on the cedar plank, and arrange the lemon slices on top of the fillets.
Cover the grill and cook for approximately 12-15 minutes, or until the salmon flakes easily with a fork and reaches an internal temperature of 145°F.
Extra Tips:
To improve the flavor even further, you can marinate the salmon in olive oil, lemon juice, and dill for 30 minutes before grilling.
Be sure to monitor the grill temperature to prevent the cedar plank from catching fire; if it starts to smoke excessively, you can lightly spray it with water.
Additionally, pairing the salmon with grilled vegetables or a fresh salad will create a well-rounded meal.
Enjoy your delicious cedar plank salmon!
Classic Neapolitan Pizza
Classic Neapolitan pizza is a beloved dish that hails from Naples, Italy, celebrated for its simplicity and fresh ingredients. With a thin, soft crust that has a slight chew and a charred, bubbly edge, this pizza is topped with a vibrant tomato sauce, creamy mozzarella, and fresh basil leaves, embodying the essence of Italian cooking.
Making a traditional Neapolitan pizza at home might seem challenging, but with a few key ingredients and some patience, you can recreate this classic dish that's sure to impress family and friends.
Ingredients:
- 500g '00' flour (or all-purpose flour)
- 325ml water
- 10g sea salt
- 3g active dry yeast
- 200g canned San Marzano tomatoes
- 250g fresh mozzarella cheese
- Fresh basil leaves
- Extra virgin olive oil
- Cornmeal (for dusting)
Cooking Instructions:
To begin, prepare the dough by mixing the flour and salt in a large bowl.
In a separate bowl, activate the yeast by dissolving it in warm water and letting it sit for about 5 minutes until frothy. Gradually combine the yeast mixture with the flour, stirring until you form a rough dough.
Knead the dough on a floured surface for about 10 minutes until it's smooth and elastic. Place the dough in a lightly oiled bowl, cover it with a damp cloth, and let it rise at room temperature for 1-2 hours, or until doubled in size.
Once the dough has risen, preheat your oven to its highest setting (ideally around 250°C/482°F) and place a pizza stone inside to heat.
While the oven is heating, crush the San Marzano tomatoes by hand and season with salt. Divide the dough into individual balls (about 220g each), and let them rest for another 30 minutes.
Roll out each ball on a floured surface into a thin circle. Spread a thin layer of tomato sauce on each base, tear the mozzarella into pieces and scatter over the sauce, and add fresh basil.
Transfer the pizza to the hot stone and bake for 8-10 minutes until the crust is golden and bubbly.
Extra Tips:
For the best results, use '00' flour if you can find it, as it creates a wonderfully soft and chewy crust.
Be sure to let the dough rise properly; this is essential for developing flavor and texture.
When making the sauce, keep it simple—just tomatoes and salt is all you need to let the quality of the ingredients shine through.
Finally, if you want a more authentic smoky flavor, consider using a pizza oven or a grill instead of a conventional oven. Enjoy your homemade Neapolitan pizza fresh out of the oven!