
If you're looking to enhance your meals without gluten, you'll want to investigate some of the best recipes that not only satisfy your cravings but also nourish your body. Imagine a quinoa salad bursting with roasted vegetables or the lightness of zucchini noodles drizzled in homemade pesto. These dishes offer a delightful balance of flavor and health. But that's just the beginning. There are two irresistible desserts waiting to be revealed—one that's decadently rich and another that's delightfully tropical. Curious about what they are? Keep going.
Quinoa Salad With Roasted Vegetables

Quinoa salad with roasted vegetables is a vibrant and nutritious dish perfect for any meal. This gluten-free salad combines the nutty flavor of quinoa with a mix of colorful, roasted vegetables, creating a delightful texture and taste.
It's not only filling but also packed with vitamins and minerals, making it a hearty option for lunch or dinner. The beauty of this recipe lies in its versatility; you can customize the vegetables based on your preferences or what you have on hand.
Ingredients:
- 1 cup quinoa
- 2 cups vegetable broth or water
- 1 red bell pepper, diced
- 1 zucchini, diced
- 1 cup cherry tomatoes, halved
- 1 red onion, diced
- 2 tablespoons olive oil
- 1 teaspoon garlic powder
- 1 teaspoon dried oregano
- Salt and pepper to taste
- Fresh parsley, chopped (for garnish)
- Lemon wedges (for serving)
Cooking Instructions:
Preheat your oven to 425°F (220°C). Rinse the quinoa under cold water and then combine it with the vegetable broth or water in a saucepan. Bring to a boil, then reduce the heat to low, cover, and simmer for about 15 minutes until the quinoa is fluffy and the liquid is absorbed.
While the quinoa cooks, toss the diced bell pepper, zucchini, cherry tomatoes, and red onion in a large bowl with olive oil, garlic powder, oregano, salt, and pepper. Spread the vegetables out on a baking sheet and roast in the oven for 20-25 minutes until they're tender and slightly caramelized.
Once the quinoa and vegetables are ready, combine them in a large bowl, toss gently, and garnish with fresh parsley. Serve with lemon wedges on the side.
Extra Tips:
For added flavor, consider marinating the vegetables in balsamic vinegar or your favorite vinaigrette before roasting. You can also add protein to the salad, such as chickpeas or grilled chicken, to make it even more filling.
If you're preparing this salad in advance, keep the quinoa and roasted vegetables separate until just before serving to maintain freshness. Finally, feel free to experiment with different vegetables such as eggplant, spinach, or asparagus to suit your taste!
Zucchini Noodles With Pesto

Zucchini noodles with pesto is a fresh and flavorful dish that makes for a perfect gluten-free meal. This light alternative to traditional pasta isn't only easy to prepare but also packed with nutrients. The vibrant green pesto adds a burst of flavor, making this dish satisfying and delicious.
Whether you're looking for a quick weeknight dinner or a healthy lunch option, zucchini noodles with pesto is sure to impress.
Ingredients:
- 2 large zucchinis
- 1 cup fresh basil leaves
- 1/4 cup pine nuts
- 1/2 cup grated Parmesan cheese (or nutritional yeast for a vegan option)
- 2 cloves garlic, minced
- 1/2 cup olive oil
- Salt and pepper to taste
- Cherry tomatoes, halved (optional for garnish)
Cooking Instructions:
Using a spiralizer or a vegetable peeler, create zucchini noodles by slicing the zucchinis into long, thin strands.
In a food processor, combine the basil, pine nuts, Parmesan cheese, minced garlic, and a pinch of salt and pepper. Pulse until finely chopped, then gradually add the olive oil while processing until smooth.
In a large skillet over medium heat, lightly sauté the zucchini noodles for 2-3 minutes until just tender. Remove from heat and toss the noodles with the pesto until well coated. Serve immediately, garnished with cherry tomatoes if desired.
Extra Tips:
When making zucchini noodles, be careful not to overcook them as they can become mushy.
For added flavor, consider roasting the pine nuts before adding them to the pesto. You can also customize the pesto by adding spinach or kale for extra nutrients or using walnuts instead of pine nuts for a different flavor profile.
If you're preparing this dish in advance, keep the pesto and zucchini noodles separate until you're ready to serve to maintain the best texture.
Gluten-Free Chicken Tenders

Gluten-free chicken tenders are a delicious and satisfying alternative to traditional breaded chicken strips. Crispy on the outside and tender on the inside, these tenders are perfect for a family dinner or a casual get-together.
Using gluten-free breadcrumbs or crushed gluten-free cereal, you can achieve that delightful crunch while keeping the dish safe for those with gluten sensitivities. Serve them with your favorite dipping sauce for a delicious meal that everyone will love!
Ingredients:
- 1 pound chicken breast tenders
- 1 cup gluten-free breadcrumbs
- 1/2 cup grated Parmesan cheese
- 2 large eggs
- 1 teaspoon garlic powder
- 1 teaspoon onion powder
- 1 teaspoon paprika
- Salt and pepper to taste
- Cooking oil (for frying)
Instructions:
Start by preheating your oven to 400°F (200°C) if you prefer baking the tenders instead of frying.
In a shallow bowl, whisk together the eggs. In another bowl, combine the gluten-free breadcrumbs, Parmesan cheese, garlic powder, onion powder, paprika, salt, and pepper.
Dip each chicken tender into the egg mixture, allowing excess to drip off, then coat it thoroughly with the breadcrumb mixture.
If frying, heat oil in a large skillet over medium heat and cook the chicken tenders for about 3-4 minutes on each side until golden brown.
If baking, place the tenders on a baking sheet lined with parchment paper and bake for 15-20 minutes, flipping halfway through, until they're cooked through and crispy.
Extra Tips:
For extra crunch, you can double-dip the chicken tenders by repeating the egg and breadcrumb steps.
Feel free to experiment with different seasonings in the breadcrumb mixture to customize the flavor to your liking.
If you want a healthier option, consider using an air fryer for a lower-oil cooking method while still achieving a crispy texture.
Always verify the chicken is cooked to an internal temperature of 165°F (75°C) for safe consumption.
Enjoy your gluten-free chicken tenders with a side of fresh veggies or a crisp salad!
Flourless Chocolate Cake
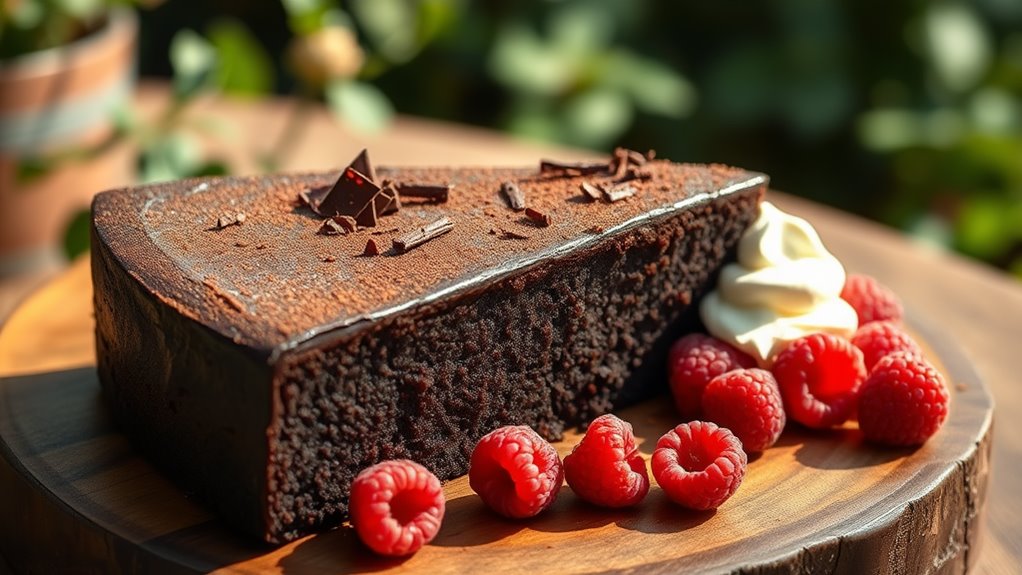
Flourless chocolate cake is a decadent dessert that's both rich and indulgent, perfect for chocolate lovers and those following a gluten-free diet. This cake utilizes high-quality chocolate and simple ingredients to create a moist and fudgy texture that melts in your mouth.
It's an ideal choice for special occasions or a delightful everyday treat, and it can be easily served with whipped cream or fresh berries for an added touch of elegance.
Ingredients:
- 1 cup (6 oz) bittersweet or semisweet chocolate, chopped
- 1/2 cup (1 stick) unsalted butter
- 3/4 cup granulated sugar
- 1 teaspoon vanilla extract
- 1/4 teaspoon salt
- 3 large eggs
- 1/2 cup unsweetened cocoa powder
Instructions:
Preheat your oven to 375°F (190°C) and grease an 8-inch round cake pan.
In a medium saucepan, melt the chopped chocolate and butter over low heat, stirring until smooth and combined. Remove from heat and let it cool slightly.
In a mixing bowl, whisk together the sugar, vanilla extract, and salt. Add the melted chocolate mixture and stir until well combined.
Then add the eggs one at a time, whisking until fully incorporated after each addition. Finally, sift in the cocoa powder and mix until just combined.
Pour the batter into the prepared cake pan and smooth the top. Bake in the preheated oven for 25 minutes or until the center is set but still slightly soft.
Allow the cake to cool in the pan for 10 minutes before inverting onto a serving plate.
Extra Tips:
For an even richer flavor, consider using high-quality dark chocolate with at least 70% cocoa content.
You can also improve the cake with a pinch of espresso powder or a splash of coffee in the batter for a deeper chocolate taste.
When serving, dust the top with powdered sugar or cocoa powder for a beautiful finish.
This cake can be stored in an airtight container at room temperature for up to three days, or it can be refrigerated for longer shelf life, though it's best enjoyed fresh.
Coconut Macaroons

Coconut macaroons are a delightful gluten-free treat that brings a tropical flair to any dessert table. These chewy, sweet morsels made primarily from shredded coconut aren't only simple to prepare but also satisfyingly indulgent.
Whether you're hosting a gathering, celebrating a special occasion, or just craving a sweet snack, coconut macaroons are sure to please everyone with their delightful texture and flavor.
Ingredients:
- 3 cups shredded unsweetened coconut
- 2/3 cup sweetened condensed milk
- 1 teaspoon vanilla extract
- 2 large egg whites
- 1/4 teaspoon salt
- 1/2 cup semisweet chocolate chips (optional, for drizzling or dipping)
Instructions:
Preheat your oven to 325°F (160°C) and line a baking sheet with parchment paper.
In a large mixing bowl, combine the shredded coconut, sweetened condensed milk, and vanilla extract, mixing until fully combined.
In a separate bowl, whisk the egg whites and salt until soft peaks form, then gently fold the egg whites into the coconut mixture until just combined.
Use a tablespoon or cookie scoop to form small mounds of the mixture on the prepared baking sheet, spacing them about 2 inches apart.
Bake for 15-20 minutes or until the tops are golden brown. Let cool on the baking sheet for a few minutes before transferring them to a wire rack to cool completely.
If desired, melt the chocolate chips and drizzle or dip the cooled macaroons in chocolate before serving.
Extra Tips:
For an extra burst of flavor, consider adding a teaspoon of almond extract or a pinch of cinnamon to the coconut mixture.
If you prefer a chewier texture, use sweetened shredded coconut instead of unsweetened.
These macaroons can be stored in an airtight container at room temperature for up to a week, making them a great make-ahead dessert.
Feel free to experiment with different toppings, such as crushed nuts or dried fruit, to customize your coconut macaroons to your liking!